Car Paint Repair: How to Repair Clear Coat Scratch
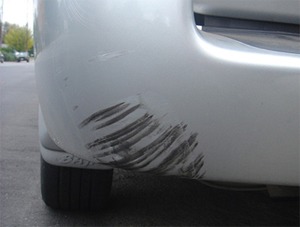
Most car scratches only go into the clear coat, but don’t gouge into the paint layer. These kinds of scratches can be caused by bushes, tree branches, keys, and fingernails around the door handle, drive-through car wash, etc.
Light clear coat scratches can be easily fixed with some good quality rubbing compound. Medium to deep clear coat scratches require some sanding.
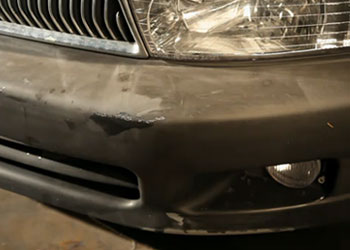
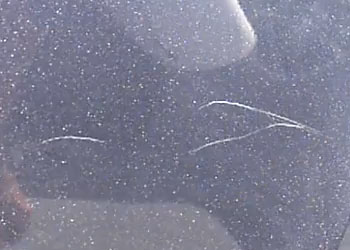
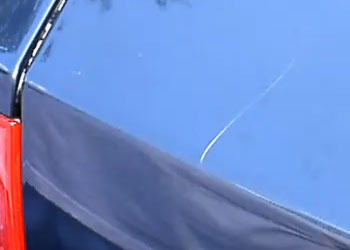
This blue-gray Pontiac had a medium clear coat scratched. To remove it, the body shop would take the same steps I am outlining below. The whole repair should take you about 15 min.
Items You’ll Need:
- Wet/dry 2,000 grit sandpaper
- Prep solvent – It removes oils, road grease, dirt, car wax, and other surface contaminants and also improves adhesion to the surface.
- Meguiar’s Ultimate Compound – You can use any rubbing compound you like, just make sure it is clear coat safe. Meguiar’s Ultimate Compound is the best car scratch remover I’ve ever tried. It removes light-to-deep clear coat scratches, swirl marks, stains, and heavy oxidation in just a few minutes. It’s clear coat safe and inexpensive.
- Applicator Pads – These pads are used to apply rubbing compound, polish, and wax.
Optional Items:
- Meguiar’s Ultimate Polish – Use your favorite polishing compound. I like Meguiar’s Ultimate Polish because it uses diminishing abrasive technology, meaning the tiny abrasives break down gradually as you rub. The paint color will look bolder and brighter with a smooth, sleek shine. It is high quality, inexpensive, long-lasting, and clear coat-safe.
- Meguiar’s Tech Wax – Use your favorite wax. I like Meguiar’s NXT Generation Tech Wax. This product is amazing because not only does it give the deepest and clearest shine you’ve ever seen, but it also acts as a paint sealer giving your car long-lasting protection.
- Microfiber Towel – Avoid using other materials such as bath towels, paper towels, or washcloths, as they might leave scratches on the clear coat.
- Dual Action Sander/Polisher – I found a nice beginner polisher on Amazon for a reasonable price that will give you amazing results. There are a lot of professional polishers, but they cost over $200. This Black & Decker polisher got great customer reviews.
Note: When it comes to car paint repair products, I use a lot of Meguiar’s products, because they always deliver high-quality jobs, are very inexpensive, and are easy to use. But you can use any products you like.
The only thing that I recommend is, if you are not sure how well different brand products work together, stick to one brand throughout the whole process. The same brand products are specifically made to work with each other, therefore you’ll have better results.
Step 1: Wash and Dry your car
Use special auto detergent or dish soap to remove wax, oil, and grease from the repair area. Follow it with prep solvent. It’s very important to start with a clean area for successful paint repair. When done washing, dry it completely with a soft towel or allow it to air dry.
Step 2: Sanding Clear Coat
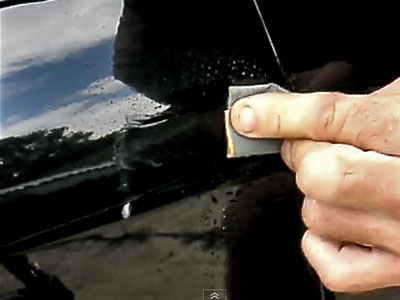
Sand the scratch with wet/dry 2,000-grit sandpaper. I like using wet sanding more than dry sanding because it cuts faster. Soak sandpaper in cold water for 10 min. Spray the area with water and gently sand the scratch. Your goal is to even out the surface without sanding through the clear coat.


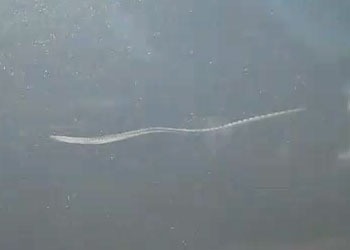
Remove dust after each round of sanding. Check with your fingers for smoothness. If you start seeing paint color on your sandpaper, that means you are sanding too much. The white matter in the photo below looks like some kind of paste, but really it is just dust from clear coat sanding mixed with water.
It might take you a few rounds of sanding and cleaning the area to get the surface even. After you are done sanding, clean the surface. Don’t be concerned about the area looking dull. Those sand scratches will be easily removed in the next step.

Step 2: Rubbing Compound
Use a rubbing compound to get rid of sand scratches. Apply a small amount of rubbing compound on a clean applicator pad. Rub over scratch using a firm circular motion until the rubbing compound is dry.

Step 3: Remove Residue
Remove remaining product with a clean microfiber cloth using circular motion with a lot of pressure. Avoid using other materials such as bath towels, paper towels, or washcloths since they are too rough and might leave scratches on the clear coat.

Step 4: Polish the Area
Now that the scratch is gone, the surface is a little dull. Use polishing compound to restore the shine. Apply a small amount of polishing compound to a clean microfiber pad and polish the area for 1 to 2 minutes with circular motions. This will restore the shine and provide paint protection.
Although polishing can be done by hand, you will get a better and faster result when using a buffing/polishing machine. I found a nice beginner dual action polisher on Amazon for a reasonable price that will give you amazing results.

Step 5: Wax Your Car
You are almost done. Apply your favorite wax using a buffer or by hand.
Final Result:
You should have nice shiny surface free of scratches. Don’t be surprised if the repair area look better than the rest of your car after all that polishing.


Hello, some one put deep key,or something sharp scratches how do I fix
Hi Jerry. Figure out how deep the scratches are. Did they only damage the paint? Did they damage the primer? If primer was damaged, you should sand the whole area with 320 grit sandpaper to make the surface smooth. Then apply few layers of primer, paint and clear coat.
hi, really helpful tips you here =)
anyway i tried to remove some scuff marks and residue off my car paint, but i think i used the wong grit sand paper i believe it ws 1000, do you think rubbing compound and polishing compound will do the trick or do i need some touch paint and clearcoat? thanks!
Hi Patrick. 1,000 grit is a little low. I usually use 1,500 or 2,000 grit to avoid sanding too much of the clearcoat. I also like wet sanding more. You should use rubbing compound to remove the scratches made by sanding and follow it with polishing compound. Unless you sanded right to the paint, you don’t need to apply the touch up paint. BTW, I am planning on posting new articles on how to remove clear coat scratches sometime next week. These articles will include videos and step-by-step photos. Hope this helps.
Thank you for making this info available! I used the rough side of a sponge to remove sap from my mom’s car only to discover once things dried that I was sanding into the clearcoat on each of those spots. The paint is still there…just no clear coat/ shine/gloss to the car in those spots. Any recommendation on how to proceed? I feel like a dummy and I’m hoping I can fix this myself. (Would all the steps you outlined here/in your clearcoat article be necessary? When would applying more clearcoat be necessary?) I look forward to hearing back from you.
Hi Eddie. Try to use only rubbing compound and polishing compound to restore the shine before anything else. If that doesn’t work then you need to spray few coats of clear coat and blend those in with rubbing & polishing compounds.
Hi, I have a different problem. I have a rav4 with a hard plastic cover. I backed into a wall and broke off a piece of the cover. I used all purpose adhhesive to stick it back on. there is now a littlle 1/4 circle seam showing. Mike, do you think if i apply touch up paint it will make the seam disappear, Thanks Ji
the hard plastic coove ris for covering the spare tire.Thanks again
Hi, I was wondering does this technique work on motorcycle plastic fearings? I also have a small starch one my gas tank ( it’s an aluminum tank that is painted) thanks ian
Hi, I have a problem on the tailgate of my Nissan pathfinder. I sprayed painted by myself and leave some deep lines of tape marks because I didn’t mask it well. Please help me, what should I do to remove it. Please email me asap. Thanks