How to Remove Residue and Scuff Marks

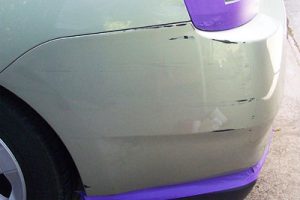
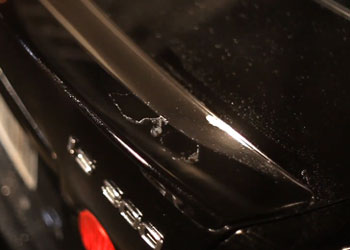
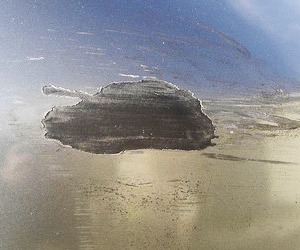
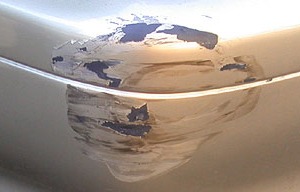
Not all scratches are the same. Some scratches are just marks raised above the paint that are left by another object. If the object that rubbed against your car is softer than the car’s paint, it will deposit material on the paint’s surface.
That object could be a rubber bumper of the shopping cart, the door of another car, or a wooden post. It can also be tree sap, road tar, glue, goo, or various crud.
To distinguish a scratch from a mark, go over it with your fingernail at a 90-degree angle. This will tell you if it’s gouged into the paint or sitting on top of the surface. It shouldn’t take you more than an hour to repair residue or scuff marks.
Items For Removing Easy Marks:
- 3M Adhesive Tar & Wax Remover – You can use any adhesive remover, but make sure it is clear coat and paint safe. I like 3M Aerosol Adhesive Tar & Wax Remover because it is the best product on the market when it comes to getting rid of all kinds of stubborn marks.
- Microfiber Towel – Avoid using other materials such as bath towels, paper towels, or washcloths, as they might leave scratches on the clear coat.
- Meguiar’s Tech Wax – Use your favorite wax. I like Meguiar’s NXT Generation Tech Wax. This product is amazing because not only does it give the deepest and clearest shine you’ve ever seen, but it also acts as a paint sealer giving your car long-lasting protection.
Additional Items For Removing Tough Marks:
- Acetone
or Lacquer Thinner
- Wet/dry 1,500 sandpaper
- Applicator Pads – These pads are used to apply rubbing compound, polish, and wax.
- Meguiar’s Ultimate Compound – You can use any rubbing compound you like, just make sure it is clear coat safe. Meguiar’s Ultimate Compound is the best car scratch remover I’ve ever tried. It removes light-to-deep clear coat scratches, swirl marks, stains, and heavy oxidation in just a few minutes. It’s clear coat safe and inexpensive.
- Meguiar’s Ultimate Polish – Use your favorite polishing compound. I like Meguiar’s Ultimate Polish because it uses diminishing abrasive technology, meaning the tiny abrasives break down gradually as you rub. The paint color will look bolder and brighter with a smooth, sleek shine. It is high quality, inexpensive, long-lasting, and clear coat-safe.
Tip: I tried a lot of different products and I have to say, above products are my favorite. 3M and Meguiar’s products are used by a lot of professionals, because they do a high quality job, very easy to use, inexpensive and long lasting. I buy all the products online, usually on Amazon.com site, since it is secure, has lowest prices, free shipping and no tax.
Step 1: Wash and dry your car
Make sure the repair area is clean and dry. If you are planning on applying a new coat of wax, remove the old wax by washing the whole car with warm water and a few drops of dishwasher soap.
That will remove old wax and prepare your car for the repair. If you don’t want to reapply wax, just wash your car with wax-safe auto soap. I use Meguiar’s Car Wash which does an excellent job of getting rid of dirt without removing wax protection. Washing your car will probably not remove the mark, but will make it less noticeable.
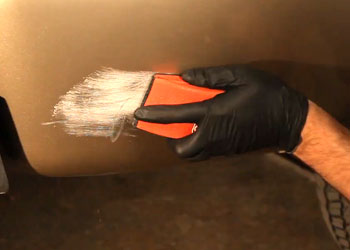
Step 2: Use Adhesive Remover
Marks from plastic, rubber, tree sap, glue, and other paint can be easily removed by using good-quality adhesive remover. All you need to do is spray the area and wipe it off with a soft microfiber cloth.
Don’t forget to wear gloves when working with chemicals. This is a very powerful product that will remove the mark and the wax underneath, but will not damage the clear coat or the paint.
Step 3: If the marks are still there
You can try removing it with acetone or lacquer thinner. But be careful, it might remove some of your clear coat and paint. If the mark is gone, all you need to do is wax the car.
Step 4: Removing Tough Marks
If the above products don’t work, sand it with a fine wet/dry 1,500 grit sandpaper. Soak sandpaper in cold water with a few drops of dishwasher soap for about 10 minutes. Carefully sand down the mark without sanding through to the clear coat. After sanding, apply rubbing compound to get rid of sanding marks.
I personally use Meguiar’s Ultimate Compound which does a great job removing light-to-deep clear coat scratches and swirl marks. It works like a very fine sandpaper, removing clear coat scratches from the sandpaper, without damaging the paint. Apply a small amount to the foam applicator pad.
Avoid using other materials such as a bath towel, a paper towel, or a washcloth, as they might leave scratches on the clear coat. Rub over the scratch using a firm circular motion until the rubbing compound is dry. Remove the remaining product with a dry micro-fiber detail cloth.
Step 5: Polishing
This step is optional. Use your favorite polishing compound to get a shiny finish. Apply a small amount to the clean micro-fiber cloth and rub on the surface in a circular motion.
Step 6: Wax Your Car
This is the last step. Re-apply wax and you are done. I use Meguiar’s NXT Generation Tech Wax. This extremely durable, long-lasting wax will give your car the “wet look” you see in the showrooms.
It protects against UV damage, and eliminates fine scratches and swirls, providing a tough polymer bond for durable protection. I like it, but you should use any wax you like.

I recently had a sticker removed from my car and they used goof off to remove the glue. I now notice a light haze going up both sides of my vehicle. What can I do to fix this?