How to Repair Deep Car Scratches on Toyota Prius

Taking your car to the body shop to repair a few scratches can be very costly. Usually, to fix a medium size scratch will run anywhere from $400 – $1,000. In this economy, not many people have extra cash lying around.
The good news is you can save hundreds of dollars by fixing it yourself. If you are afraid to make it worse, don’t be. Professionals at the body shop will follow the same steps I am describing below. The key to a successful scratch repair job is patience.
This is a weekend project. You can probably do everything in just a couple of hours, but for the best result, it is better to stretch it over 2 days.
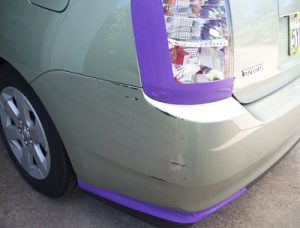
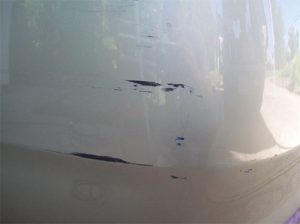
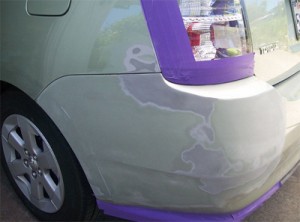
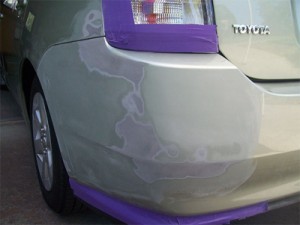
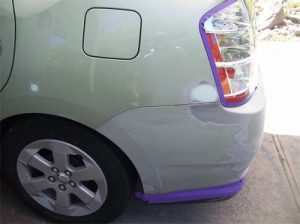
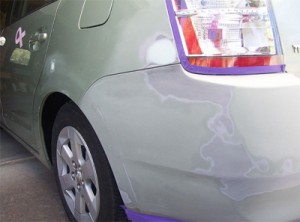
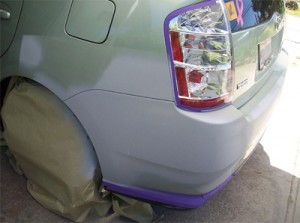
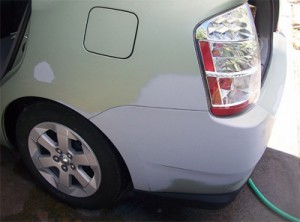
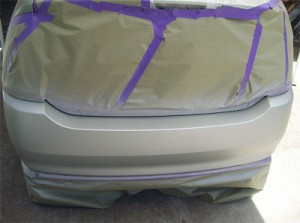
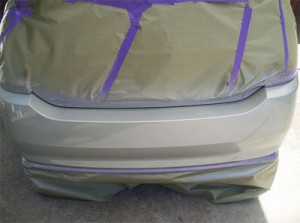
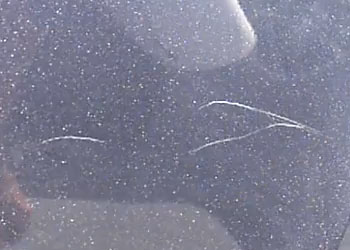
The Toyota Prius in the photo had a few deep bumper scratches and two small dents. To repair this kind of damage you’ll need to even out the area with body filler, apply primer, apply paint, and finish it with a clear coat.
First, you need to start by getting all the tools and products. The goal is to save money without compromising on quality. Below, are the products I like and personally use. They are affordable and of great quality. Of course, you can use any products you like. Everybody has their own preferences.
Items you will need:
- Assorted Wet/Dry Sandpaper – This pack includes 5 sheets of assorted sandpaper (1 sheet each of 180, 320, 600, 1,000, and 1,500) and can be used for sanding primer, clear coats, and automotive paints.
- Spot Putty
- Plastic Spreaders
- Primer
(aerosol spray)
- Touch-up Paint
- Clear coat
- Auto masking tape
- Prep solvent – It removes oils, road grease, dirt, car wax, and other surface contaminants and also improves adhesion to the surface.
- Meguiar’s Ultimate Compound – You can use any rubbing compound you like, just make sure it is clear coat safe. Meguiar’s Ultimate Compound is the best car scratch remover I’ve ever tried. It removes light-to-deep clear coat scratches, swirl marks, stains, and heavy oxidation in just a few minutes. It’s clear coat safe and inexpensive.
Optional Items
- Rust Remover
- Respirator, Gloves, Goggles
- Meguiar’s Ultimate Polish – Use your favorite polishing compound. I like Meguiar’s Ultimate Polish because it uses diminishing abrasive technology, meaning the tiny abrasives break down gradually as you rub. The paint color will look bolder and brighter with a smooth, sleek shine. It is high quality, inexpensive, long-lasting, and clear coat-safe.
- Meguiar’s Tech Wax – Use your favorite wax. I like Meguiar’s NXT Generation Tech Wax. This product is amazing because not only does it give the deepest and clearest shine you’ve ever seen, but it also acts as a paint sealer giving your car long-lasting protection.
- Microfiber Towel – Avoid using other materials such as bath towels, paper towels, or washcloths, as they might leave scratches on the clear coat.
- Applicator Pads – These pads are used to apply rubbing compound, polish, and wax.
- Dual Action Sander/Polisher – I found a nice beginner polisher on Amazon for a reasonable price that will give you amazing results. There are a lot of professional polishers, but they cost over $200. This Black & Decker polisher got great customer reviews.
- Tack cloth
Step 1: Getting the paint
First, find the car’s paint code. It should be located in a place like a glove box, under the hood, in the trunk, or on the passenger side door. The location depends on the make and model of your car.
Next, order the paint from a dealership or, if you want to save money, order it online. To repair large damage, you need to get paint in a spray can. I’ve heard some people are using a paint roller and a bucket of paint.
I am all for being creative, but please, don’t do it. You will not get a professional result by using a roller. Rollers are great for painting a wall, not a car.
Step 2: Personal Safety
The best way to repair large areas is to use a spray primer, spray paint, and a spray clear coat. Because all these spray products are toxic, you should protect yourself by wearing goggles, respirators, and gloves.
Also, make sure to have good ventilation if you are doing it in the garage. If the weather is good, you can spray outside.
Step 3: Check for Rust
Over time rust will eat through the metal. That is why it is important to do all the repairs as soon as possible. If you see rust, use rust remover to get rid of it.
Step 4: Prepare the surface
Clean the area to be repaired with some dish soap and water. A few drops of dish soap will help you to get rid of wax, and oil. Follow it with prep solvent to make sure the surface is completely clean of any contaminates. If not removed, wax and dirt can compromise the whole repair job. Then dry completely.
Step 5: Sanding
Start by sanding the area with wet/dry 320-grit sandpaper wrapped around a sponge. Use a lot of water with a few drops of dish soap to make it more slippery. Follow it with 600-grit wet/dry sandpaper. Don’t be afraid to sand around the scratch. It is necessary for the damaged area to blend in.
The primer will cover 320-grit sand scratches. After you are done sanding, the entire area should be dull and smooth. Clean off the dust with a tack rag.
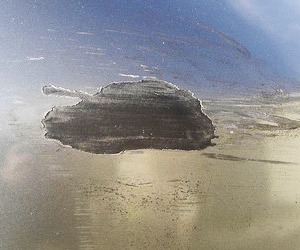
Step 6: Spot putty
If you have a little dent or a deep scratch that went into the metal, repair it with body filler or a putty. Body filler is usually used to fill gaps or depressions. Small dents, creases, or minor imperfections such as pinholes or sand scratches can be filled with a spot putty.
It takes only 15-30 min for the body putty to cure. A good quality spot putty shrinks minimally and will sand easily, giving you feathered edge.
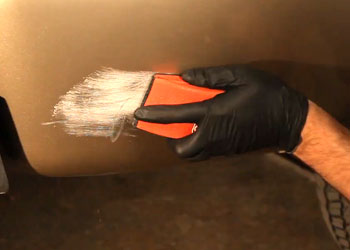
Apply spot putty across the repair surface with a flexible plastic spreader, spreading it outside of the actual damage. Give it enough time to cure before sanding .
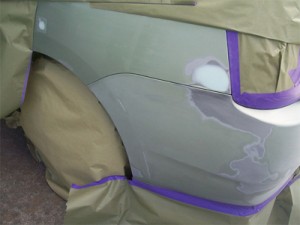
Start sanding with wet/dry 320-grit sandpaper and follow it with a higher grade for a smooth finish. For fixing two small dents on this Toyota Prius, spot putty was a better choice.
Step 7: Cleaning and Masking
Clean the surface with a tack rag. Use special auto masking tape and old news papers to mask off the area around the damage. I know, some people are trying to save money by using a duck tape.
Bad idea. Duck tape will leave a sticky residue that is hard to remove. Just spend a few dollars and get the auto tape.

Step 8: Primer
Surface preparation is the hardest part. After you are done with sanding and putty, it’s time to prime. Read the instructions for the primer. Shake the primer can well before application.
Hold the can 10-12 inches away from the surface and spray in even strokes. 2- 3 coats should be enough. Allow the primer to dry between coats. After removing the masking paper, you will notice lines left by primer. They can be easily removed by sanding.
Step 9: Sanding Primer and Masking
Wet sand the primer with wet/dry 600-grit sandpaper. Sand the area that might get some base coat and some clear coat with wet/dry 1,000-grit sandpaper. Let the sandpaper soak in the water for 10 min.
To avoid leaving finger impressions, wrap a sponge with a sandpaper. Few drops of dish soap will make the surface more slippery. Keep checking the surface for smoothness with your fingers.
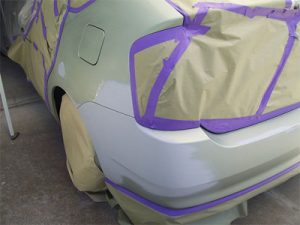
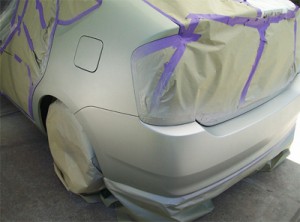
Next, dry the area completely and mask it off with an auto tape and old newspapers. We left a little less area for primer because we didn’t want the primer to get on top of non-damaged area.
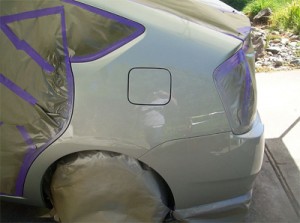
But for spray painting, we want to have a larger area for better blending with the old paint. Some of you probably can’t believe that to fix a few small scratches you have to repaint half of the car.
Most people think they only need to paint the scratched area and not the whole panel. Unfortunately, to blend it well with the old finish you need to repaint the full panel. In case of this Toyota Prius, its two panels, the rear left side and the rear bumper.
Step 10: Applying Touch Up Paint
Wait for 30 min before applying touch up paint. Spray the test panel first with both base coat to make sure the new touch-up paint is matching.
Avoid applying paint in direct sunlight, windy conditions or high humidity. The best temperature would be 72F with a 50% humidity. Read instructions on the paint first.
Shake the can and spray the body panel in even strokes. Do 3 layers giving each layer enough time to dry. If you do all of the layers at once, the top layer will dry faster than the bottom layers and you will get a paint bubble.

Step 11: Clear coat
After paint application, you can see that the paint look flat and dull. It is easily fixed with clear coat application. Clear coat not only gives the paint shine and glossiness, but also protects it from wind, chemicals and chipping.
Wait for 30 min before applying clear coat. Start by reading instructions. Next, shake aerosol clear coat can well. Apply one coat and wait for it to dry before applying the next one.
Drying time should be indicated on the label. 3-4 clear coats should be enough. Wait for one day before applying rubbing compound.
Note: Small imperfections in clear coat can also be removed by gently sanding it with wet/dry 1,500-grit sandpaper. Use plenty of water when sanding.
Step 12: Rubbing Compound
The rubbing compound will fill small scratches and bring out the shine. After clear coat is dry, apply small amount of rubbing compound with a foam applicator pad. Continue rubbing the surface till it is dry. Remove the residue with a microfiber cloth. Here is an article with a video on how to apply rubbing compound.

Step 13: Polishing Compound
Polishing compounds can be applied by hand or a power buffer. Power buffer costs anywhere from $40 and up. The benefit of using a power buffer is a showroom shine that is very hard to get if you are doing it by hand.
I use if to apply rubbing compound, polisher and wax. It is a great investment that lasts for years. If you want to buy a buffer, I would recommend a Dual Action Polisher.
Step 14: Wax
Use any wax you like. Wait for 30 days before waxing.

Man, this is one good article and easy to follow. If you follow these instructions you should have an excellent repair! This is a well written piece and easy to follow! Thanks for the good work!
Picture looks exactly like my car and my small parking lot incitdent , have not completed this. Live is Costa Mesa california so want to see how much it would cost for repair sometimes I do see mobile repair. Before I start this project as a women who does not know what girt is ha ha… it willl be a challenge however your instructions look like they are detailed and easy to follow. Thank you so much or taking out your time in helping so many with this problem and don’t want to spend lots of money to get it fixed.