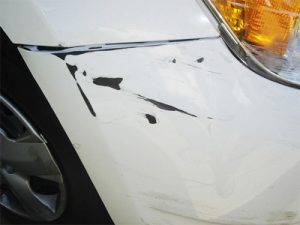
In this tutorial, I’ll show you how to repair deep scratches on the front bumper of the Toyota RAV4. As you can see from the picture, the damage was on the right side of the bumper and on the panel above the right front tire. These scratches went through the clear coat, paint layer, and primer.
Because the metal is exposed, you need to fix it as soon as possible before the rust starts to develop. Some people try to repair this type of scratch with a scratch remover.
There is no remover in the world that can fix these scratches. When paint is missing, you have to sand the area, apply the primer and spray paint. That simple.
First, let’s get all the products and tools. I buy all of my products online to save time and money.
Items you will need:
- Assorted Wet/Dry Sandpaper – This pack includes 5 sheets of assorted sandpaper (1 sheet each of 180, 320, 600, 1000, and 1500) and can be used for sanding primer, clear coats, and automotive paints.
- Primer
(aerosol spray)
- Touch-up Paint
(aerosol spray) – Custom paint matching your car
- Clear coat
(aerosol spray)
- Auto masking tape
and Old newspapers
- Prep solvent – It removes oils, road grease, dirt, car wax, and other surface contaminants and also improves adhesion to the surface.
- Meguiar’s Ultimate Compound – You can use any rubbing compound you like, just make sure it is clear coat safe. Meguiar’s Ultimate Compound is the best car scratch remover I’ve ever tried. It removes light-to-deep clear coat scratches, swirl marks, stains, and heavy oxidation in just a few minutes. It’s clear coat safe and inexpensive.
Optional Items:
- Rust Remover
- Respirator, Gloves, Goggles
- Meguiar’s Ultimate Polish – Use your favorite polishing compound. I like Meguiar’s Ultimate Polish because it uses diminishing abrasive technology, meaning the tiny abrasives break down gradually as you rub. The paint color will look bolder and brighter with a smooth, sleek shine. It is high quality, inexpensive, long-lasting, and clear coat-safe.
- Meguiar’s Tech Wax – Use your favorite wax. I like Meguiar’s NXT Generation Tech Wax. This product is amazing because not only does it give the deepest and clearest shine you’ve ever seen, but it also acts as a paint sealer giving your car long-lasting protection.
- Microfiber Towel – Avoid using other materials such as bath towels, paper towels, or washcloths, as they might leave scratches on the clear coat.
- Applicator Pads – These pads are used to apply a rubbing compound, polish, and wax.
- Dual Action Sander/Polisher – I found a nice beginner polisher on Amazon for a reasonable price that will give you amazing results. There are a lot of professional polishers, but they cost over $200. This Black & Decker polisher got great customer reviews.
- Tack cloth
Step 1: Getting the paint
Start by getting the right paint. A paint color code should be on the label located somewhere in your car. Try looking in places like the glove box, under the hood, in the trunk, or on the passenger side door.
Location may vary depending on the make and model. You can buy custom paint at the dealership or to save time and money order it online. I buy all my paint from Automotivetouchup.com. They have the lowest prices and the best quality. No matter where you buy the paint, make sure it matches your car.
Step 2: Personal Safety
To repair these damages you will be doing a lot of spraying. Spray primer, spray paint, and spray clear coat are very toxic and should be used in a well-ventilated area, preferably outside.
Also, I recommend protecting yourself by wearing goggles, gloves, and a respirator. None of these safety measures are expensive. I found on Amazon.com goggles for $4, a respirator for $1, and gloves for $1.
Step 3: Check for Rust
If you waited for a while to fix the scratch, there might be rust developing. I recommend fixing any damage right away. Rust can eat through the metal making it very difficult to repair. If you see ruts, get rid of them with a rust remover.
Step 4: Prepare the surface
Wash the area to be repaired with dish soap and water. The goal is to remove wax, dirt, and oils. Use prep solvent to remove other contaminants. You want to start with a clean surface.
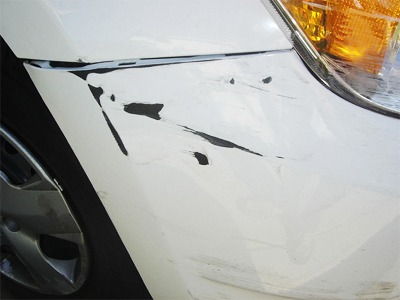
Step 5: Sanding
To avoid fingerprints, wrap wet/dry 600-grit sandpaper around the sponge. Soak for 10 min in water. Adding a few drops of dish soap will make it more slippery. Make 4 sweeps and wash off the dust. Keep checking the surface for smoothness with your fingers. When you are done sanding, clean and dry the area completely.
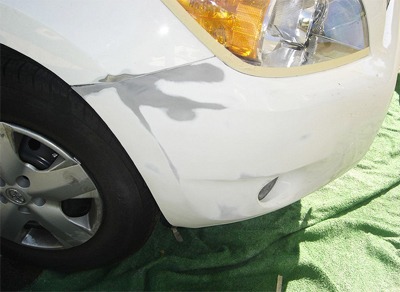
Step 6: Cleaning and Masking
Use auto tape and old newspapers to mask off the area around the damage. You want the primer to cover just a few inches outside of the damaged area.
Step 7: Primer
If there are dents, you need to use body filler or putty before applying the primer. In this case, there were no dents, so we can start with the primer. Read the instructions first. Shake the primer and spray in even strokes.
Important: Give each coat enough time to dry. Don’t worry about over-spraying. You’ll be able to clean it by sanding it in the next step.
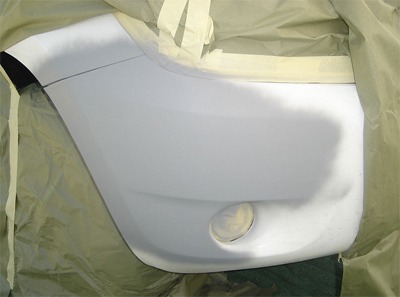
Step 8: Sanding Primer
Remove the masking tape and the paper. In this step, you need to prepare the surface for paint. If you have some primer over-spray, it can be easily removed. Start by sanding with wet/dry 600-grit sandpaper and follow with 1,000 grit.
There are a lot of discussions about whether to use dry or wet sanding. I think it is a matter of preference. You can use wet or dry sanding before the primer. When sanding the primer, I would recommend using wet sanding. It cuts faster and doesn’t clog. Make sure to use a lot of water with a few drops of dish soap.
Step 9: Cleaning and Masking
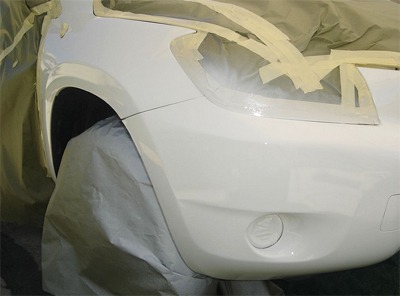
After you are done sanding, dry the area completely. Mask of a larger area than you did before priming. You need to leave enough space for color blending. I usually work on the whole panel to get better results.
In this case, I masked off the right front panel and the front bumper. The good news is, if you have a white or black car, it is very easy to get good blending between the new and the old paint.
Step 10: Applying Paint
Read the instructions on the touch-up paint spray can. Shake the can well. Try the paint in the hidden spot to be sure the colors are matching. Hold the can 10-12 inches away from the surface and spray in even strokes.
You need to blend the new paint with the old one. Start by spraying the damaged area. With every coat spray a few inches farther. Give each coat enough drying time. At the end of this step, the surface should be flat and dull.
Step 11: Clear coat
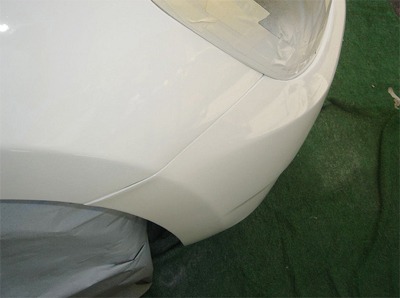
To restore the shine and to give the paint protection, apply the clear coat. Read the instructions first. Shake the can and spray in even strokes. 3 -4 coats should be enough.
Don’t forget to leave enough time for each coat to dry. Some paint comes with a clear coat already mixed in. In this case, you would skip this step.
Step 12: Sanding clear coat
There should be no need to sand the clear coat. If you see imperfections you can try smoothing them out with wet/dry 1,500-grit sandpaper.
Step 13: Rubbing Compound
The rubbing compound is applied to get rid of the smallest imperfections and smooth out the surface. Think of rubbing compound as the finest sandpaper. Place a few drops on the foam applicator pad and keep rubbing using circular motions till dry. Use a clean microfiber cloth to remove residue.
Step 14: Polishing Compound
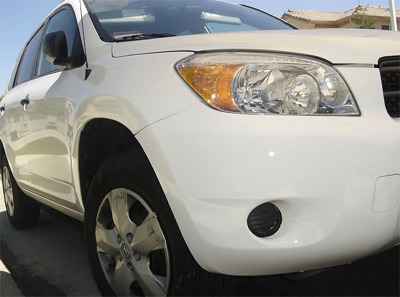
I like it when my car has a showroom shine. That’s where the polishing compound comes in handy. It can be applied by hand or by a buffing machine. The buffing machine is a great investment.
It makes the application of rubbing compound, polisher, and wax an easy process. My family has a few cars and all of them shine like they just rolled off the lot. If you do have some extra money to spend on the buffing machine, I would recommend this Dual Action Polisher. This polisher will last you many years.
Step 15: Wax
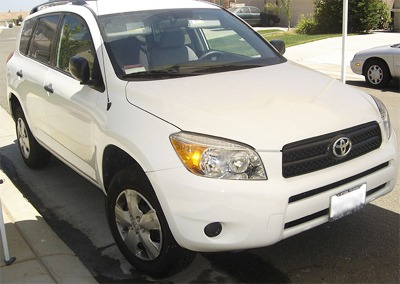
Wait for 30 days before applying wax.
You make it look so easy.
Thanks for sharing your expertise.
Mark,
Thank you for writing such a thorough instructional and including pictures. You’ve really helped me understand how to identify my type of scratch and figure out what steps I’ll need to follow for a great repair. Cheers!
KEF
thanks for this my truck has come out great following this guide. quick question thogh how long will this paint job last for typicaly and clear coat is it safe to drive a day after sparying the pannel?