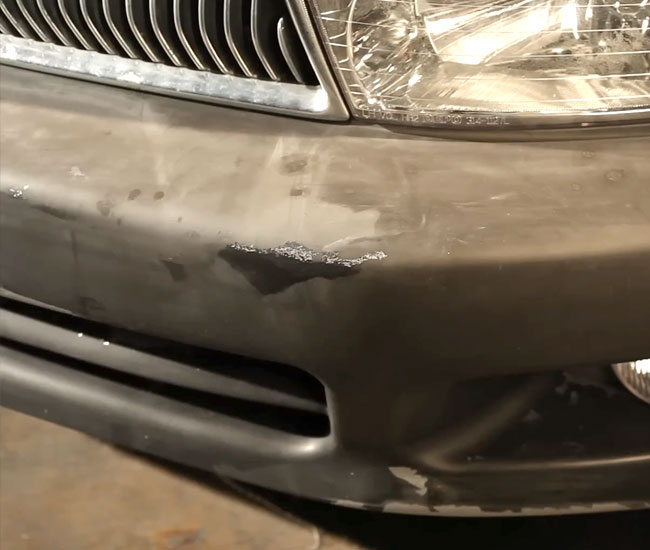
In this post, I will show you how to spray paint a plastic bumper that was improperly painted by a local body shop. After paying hundreds of dollars to a body shop, you would think that the paint job would last.
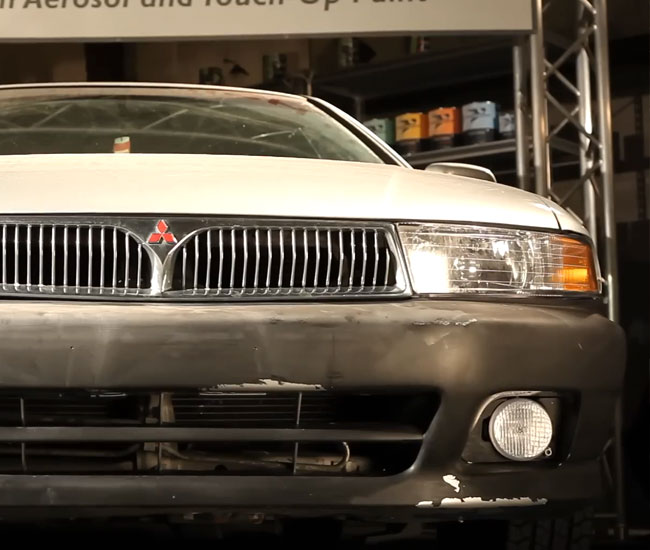
But it is not always the case. Not all body shops know what they are doing. Some of them just try to cut corners. As a result of the improper repair process, the paint on the bumper of this Mitsubishi started to peel.
The only way to repair this damage is to strip the old paint, apply plastic adhesion promoter, follow it with primer, touch up the paint, and clear coat.
This project will take you just a few hours to complete. You can do it over the weekend. If the weather is nice, do it outside in the shade.
Doing it yourself will save you a lot of time and money. Bodyshops charge anywhere from $300-$500 for painting a bumper and you will be without a car for a few days.
Since most of you don’t have any experience, I’ve tried to make this tutorial as easy to follow as possible. You can watch the video first and then read my step-by-step instructions.
Items You’ll Need:
I use high-quality products that don’t break the bank. Below are the products and tools that I personally use and recommend to all of my friends:
- Assorted Wet/Dry Sandpaper – Instead of buying a pack of sandpaper of each grit, you can get this assorted sandpaper pack that includes 5 sheets (1 sheet each of 180, 320, 600, 1,000, and 1,500). That is all the sandpaper you will need for this repair. Buying an assorted pack will save you money.
- Plastic Adhesion Promoter
– Not all primers stick well to plastic. This is a special clear primer that is used on plastic parts before primer application.
- Primer (aerosol spray) – For this repair gray primer works the best. The closer the color of the primer is to the color of the paint, the less coasts of paint you will need to cover it.
- Touch-Up Paint (aerosol spray) – You need to buy custom paint that matches your car. Click on the link and select your color.
- Clear Coat (aerosol spray) – It gives the car the shine and protects the paint. Without a clear coat, the paint will look dull.
- Gray Scuff Pad
- Auto masking tape and Old Newspapers
- Prep solvent – It removes oils, road grease, dirt, car wax, and other surface contaminants and also improves adhesion to the surface.
- Meguiar’s Ultimate Compound – You can use any rubbing compound you like, just make sure it is clear coat safe. Meguiar’s Ultimate Compound is the best car scratch remover I’ve ever tried. It removes light-to-deep clear coat scratches, swirl marks, stains, and heavy oxidation in just a few minutes. It’s clear coat safe and inexpensive.
Optional Items:
- Aerosol Spray Trigger
- Microfiber Towel – Avoid using other materials such as bath towels, paper towels, or washcloths, as they might leave scratches on the clear coat.
- Meguiar’s Ultimate Polish – Use your favorite polishing compound. I like Meguiar’s Ultimate Polish because it uses diminishing abrasive technology, meaning the tiny abrasives break down gradually as you rub. The paint color will look bolder and brighter with a smooth, sleek shine. It is high quality, inexpensive, long-lasting, and clear coat-safe.
- Meguiar’s Tech Wax – Use your favorite wax. I like Meguiar’s NXT Generation Tech Wax. This product is amazing because not only does it give the deepest and clearest shine you’ve ever seen, but it also acts as a paint sealer giving your car long-lasting protection.
- Dual Action Sander/Polisher – I found a nice beginner polisher on Amazon for a reasonable price that will give you amazing results. There are a lot of professional polishers, but they cost over $200. This Black & Decker polisher got great customer reviews.
- Respirator, Gloves, Goggles
- Applicator Pads – These pads are used to apply rubbing compound, polish, and wax.
- Tack Rag
Video Tutorial on How to Spray Paint a Car Bumper Yourself
Step 1: Getting Touch-Up Paint
It is important to buy touch-up paint that matches your car. The paint color code, located inside of your car, will help you with that.
Sometimes, finding color code can be challenging even for the pro. That is one of the reasons I created a post on where to find paint color code.
Step 2: Personal Safety
I do recommend spending a few dollars on gloves, goggles, and a mask for self-protection.
All these sprays are toxic and should be used in a well-ventilated environment. If the weather is good, do it outside in the shade. Avoid doing repairs in full sun and windy conditions.
Step 3: Wash the Area
Start by washing the surface with warm water. I like to use a few drops of dish soap to remove the dirt. Follow it with prep solvent to remove oils, dirt, and wax. Dry it when you are done.
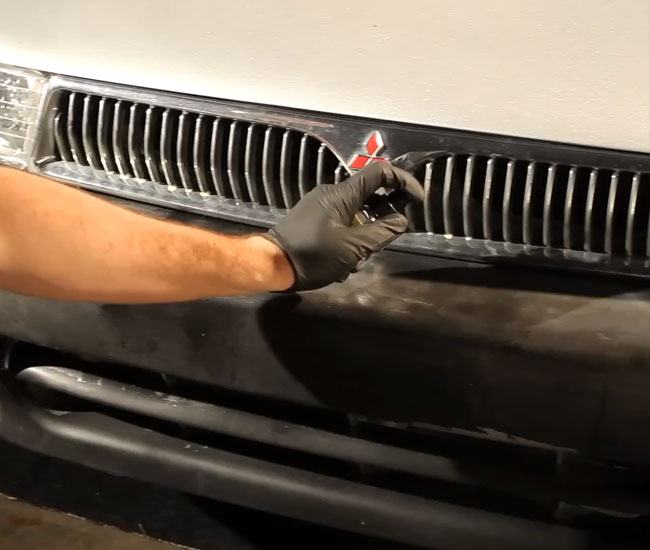
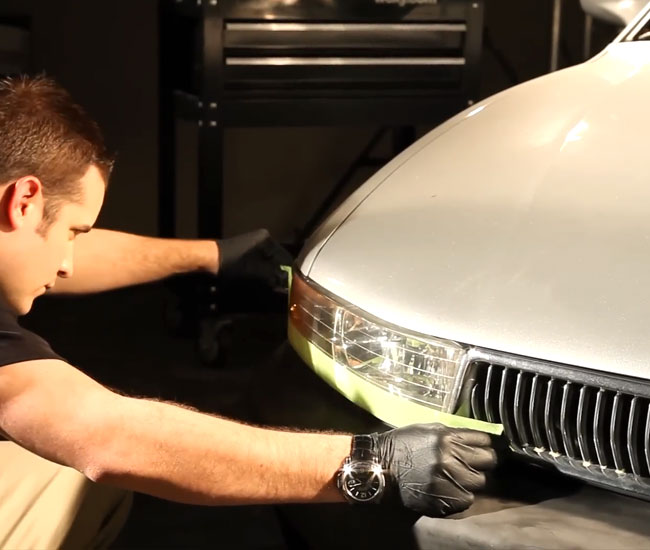
Step 4: Tape off the area
Tape off the adjacent panels and the lights to prevent damaging them. Use auto masking tape. It is very easy to remove and it costs only a few dollars.
Step 5: Scuff Sanding
Remove as much old peeling paint as you can by sanding it with 320 grit sandpaper. Clean the dust with a tack rag.
Next, sand the bumper with a gray scuff pad to ensure good mechanical adhesion. Scuffing the bumper will make it easier for the primer to stick.

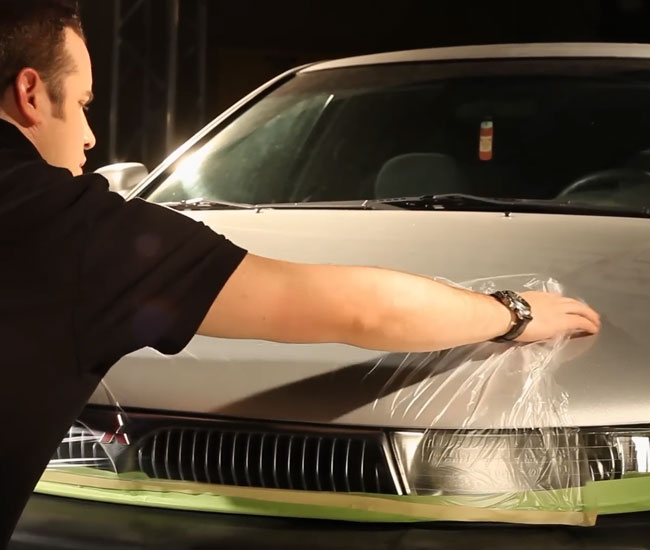
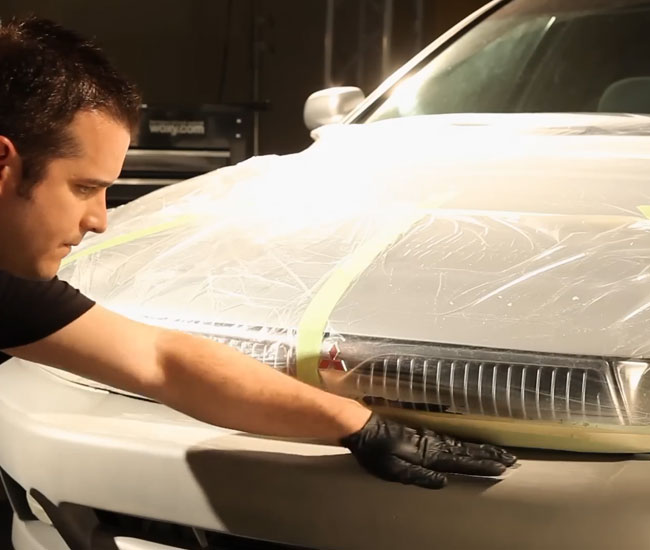
Step 6: Masking
Mask the adjacent panels with auto masking tape and old newspapers or plastic. This will protect the rest of your car from overspray. Avoid using duct tape since it will leave a sticky residue that is very hard to remove.
Step 7: Cleaning
Spray the area using prep solvent. Wipe it off with a clean microfiber towel. Microfiber towels can also be used in the future for washing and drying the car. It will never leave any scratches on your clear coat.
You can follow it with a tack rag to get rid of the dust. The area should be clean before starting all the spraying.

Step 5: Apply Plastic Adhesion Promoter
Next, spray it with Aerosol Plastic Adhesion Promoter. The promoter is a clear primer that is designed to be used over bare plastic, chrome, vinyl, galvanized metal, fiberglass, aluminum, and glass.
It remains flexible and has better adhesion to plastic than a regular primer. This step will help you make sure the primer and paint stick to the bumper.
Read the instructions on the can. Slide on the plastic trigger for better control. Shake the can. Hold it 15 inches away from the surface and spray in even strokes. 1-2 light coats are all that is needed.

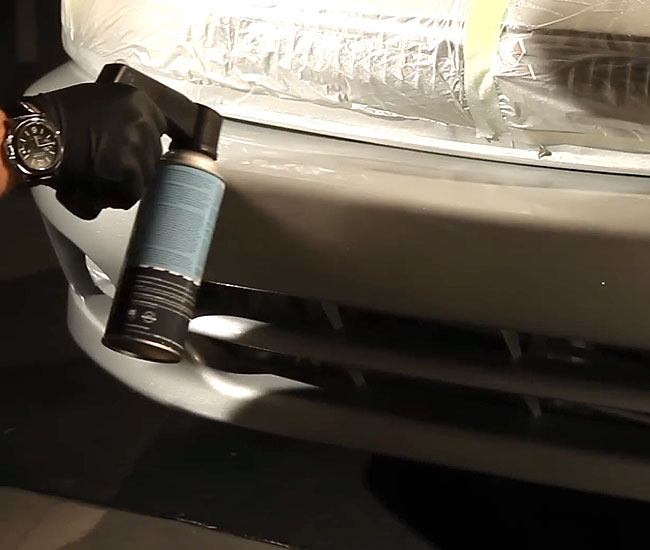
Step 6: Apply Primer
Apply gray primer next. Read the instructions on the can. Use a plastic trigger over the can for better control and coverage. Spray 3-4 coats leaving 15 min of drying time between coats.

Step 7: Sanding Primer
Wait for 30 min before sanding the primer. Lightly wet sand primer with wet/dry 600 grit sandpaper and follow it with 1,000 grit. This is a good time to remove primer overspray.
In this video, they sprayed the whole panel, so there shouldn’t be any overspray or border to feather out. Make sure the area is smooth.
Tip: Touch-up paint will cover 600 grit sand scratches.
Step 8: Applying Touch-Up Paint
Read instructions. Shake the can. Use a plastic trigger for better control. Test the touch-up paint first to make sure the paint is matching. Hold the can 15 inches away from the surface and spray in even strokes.
3-4 coats should be enough to cover the primer. Give each coat 15 minutes of drying time. If you see some dust, wipe it off with a tack rag.
After you are done, the paint will look dull in comparison to the rest of the car. To bring out the shine, we’ll need to apply a clear coat.

Step 9: Applying Clear Coat
You are almost done. Wait for 30 min before applying a clear coat. Read the instructions first. Slide on the plastic trigger. Shake the can well.
Apply a clear coat in even strokes. 3-4 layers of clear should be enough. Give each coat 10-15 min drying time. Drying time may vary, depending on the product.
At this point, the surface should be glossy, but not dripping. If you notice dust, orange peel, or other imperfections, you can fix them by sanding the clear coat with 1,500-grit sandpaper. Wait for one day before sanding. Use wet sanding instead of dry.
Step 10: Rubbing Compound
This step is not shown in the video but can be very important in removing small imperfections in the clear coat. Rubbing compound is also used to remove small clear coat scratches after sanding. Wait for one day before using the rubbing compound.

Step 11: Polishing Compound
To get that amazing showroom shine, use the polishing compound.
Step 12: Wax
Wait for one month before applying wax.

In the end, you should have a nice shiny bumper that matches the rest of the car. Let me know if you have any questions.
What if a lot of the paint on my car’s rear bumper is still intact but simply fading with slight cracks? Can it be repaired or should I just sand it all off and follow the instructions on this page?
Hi Luis. You should send down as much paint as possible. I know it looks like there is some paint that is fine and maybe you can keep it but in reality you should just repaint the whole bumper so it is all uniform color. It is just much easier than trying to fix a lot of cracks around good paint. Just spray paint the whole bumper.
The flat area he is spraying in Step 7 and 9 is the part on my rear bumper that is fading/cracked.
How long should this process take overall? I’m going to be using the car constantly for 7 weeks starting Monday (in 5 days) and am wondering if I have enough time to do this. Thanks :)
I just painted my bumper using these steps and it’s not as shiny as the rest of the car. I did 4 coats of clearcoat, waited until the next day, then rubbing compound and polishing compound. I’m just wondering if I did something wrong. Maybe too light on the clearcoats?
How much primer paint, touch up paint, clear coat spray do you use for a self paint bumber job? I know each car is different just in general is one can each enough?
What the cheapest and minimum sprayer and compressor or can I use an electric sprayer to paint my car bumper because my paint is a special color and it is in a liquid form like the professional? My bumper is new so and fiberglass. Do you know what temperature you can paint outside in? Please let me know .
Hi, I am painting the exact same bumper (Mitsubishi Galant 2001). How many bottles of paint are required? Thanks!